A GUIDE TO
choosing your semi-custom suite
We’ve tried to make the stationery process as easy as possible to meet the needs of busy, modern couples. We’re here to help answer any questions along the way! Please inquire for next steps and to set up a client call.
STEP 1 : Finding The One
Take a look at the variety of suites in the collection and choose a design that best suits your wedding style. Each suite can be customized by color/foil ink, print method, paper color and paper weight. Keep scrolling, we break down those options below!
While you’re at it, send an inquiry my way and we will set up a short call to discuss your vision and I’ll answer any of your questions. After that, you’ll receive a custom proposal to review!
STEP 2 : Making It Official
You found your forever person — and your wedding invitation designer. I love that for you. And me.
Before you sign and pay the 50% deposit, make sure the proposal reflects your final selections.
Once submitted and your date is secured, you’ll receive access to your personalized wording template along with any additional documents needed (like guest addressing spreadsheets, if selected). This will be our master document throughout the design process and keeps everything beautifully organized. Please update anything that is discussed in emails here. You will also receive a timeline to keep us both on track.
STEP 3 : Content Collection
You will begin to gather your wording and details. Once your content is finalized in the shared document, I’ll officially begin designing your invitation suite. Let me know if you are done early!
From there, you can sit back and relax while I bring your vision to life.
STEP 4 : Review Your Design
A digital proof of your entire suite will be emailed for you to review approximately 2-3 weeks after your finalized wording content is completed. If you’ve selected to add digital guest addressing, your addresses are due in the provided template, but will not be formatted until approval is received of the suite design.
If your order includes custom artwork, this will add an additional 4-6 weeks to your design timeline. You’ll receive a proof of your suite upon completion of your artwork.
Your order includes two rounds of revisions. Once your entire suite is approved, your production timeline begins. Timeframe will vary depending on a variety of factors such as print type, embellishments and custom artwork. Please refer to the FAQ’s page for more details.
STEP 5 : Off To The Press
Your production timeline will depend on your selected printing method and will ship to you following the completion of your printed pieces.
Digital Printing: 2-3 weeks upon design approval
Letterpress Printing: 5-7 weeks upon design approval
Foil Printing: 5-7 weeks upon design approval
Deckled edges to letterpress or foil (single-ply only): +1-2 weeks
STEP 6 : Delivery
Your completed wedding paper will ship directly to you once production is complete. All pieces will arrive ready for assembly unless you’ve selected full-service assembly.
And then — the best part — you get to send them off into the world.
.01
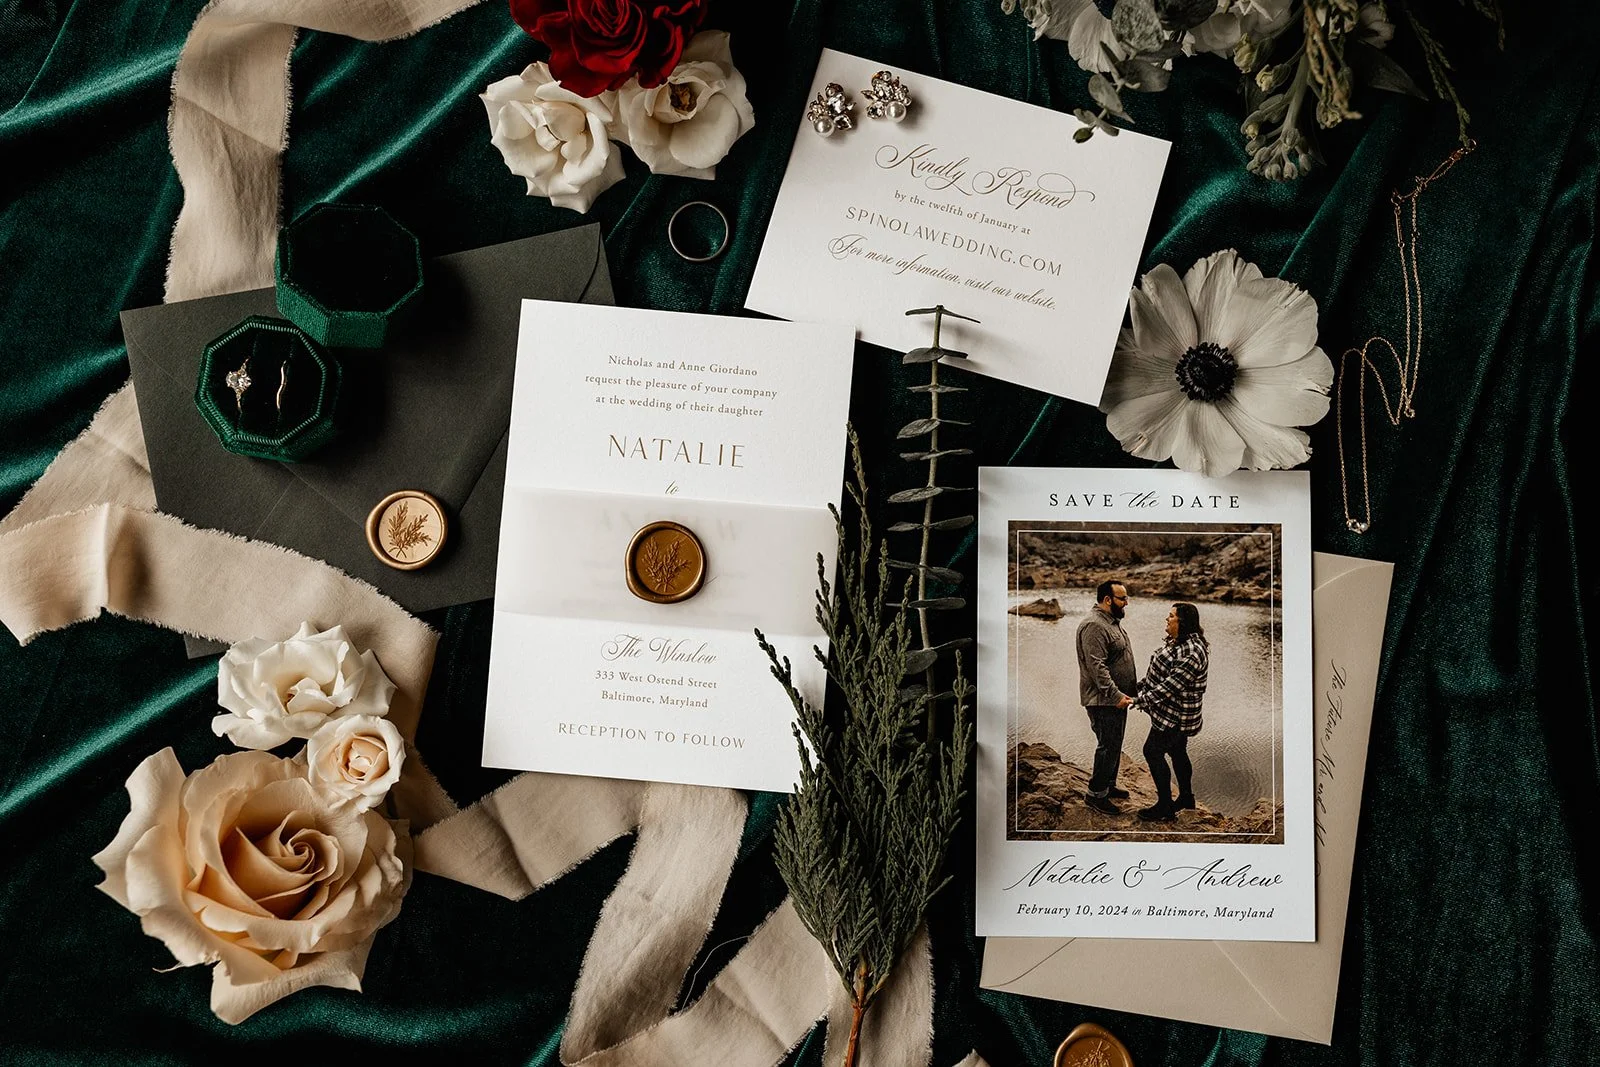
TYPES OF PRINTING
Suites are available in digital printing, letterpress printing or foil stamping. Not sure what the heck we’re talking about? We break down the differences below. You can also order a sample kit to see and feel in person.

DIGITAL
Ink is flat on the paper.
Digital or flat printing uses high-resolution, digital files to print flat images. The result is vivid color and incredible detail. When you run your finger across it, you’ll only feel the texture of the paper itself.
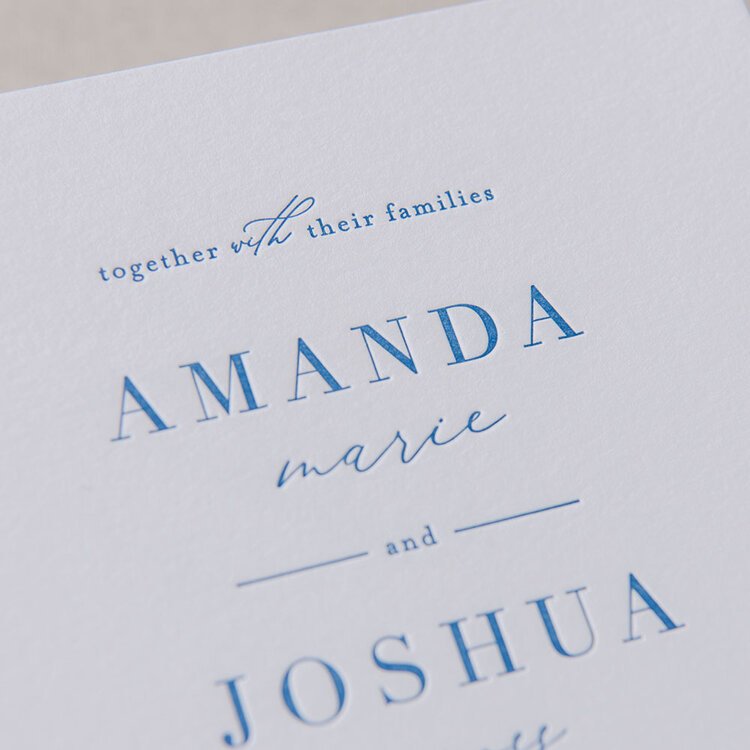
LETTERPRESS
Ink is pressed into the paper.
Letterpress is one of the oldest forms of printing dating back to the 15th century. The raised surface of a plate is inked and pressed into the paper. The result is a design that is sunken into the paper and has an inset texture. When you run your finger across it, you’ll feel where the design is indented into the paper.

FOIL
Foil is pressed into the paper.
This type of printing is similar to letterpress, but instead of ink, metallic foil is applied to paper with pressure. When you run your finger across it, you’ll feel where the design is indented into the paper.
.02
INK & FOIL OPTIONS
The ink and foil color shown below may not be true to tone. To ensure colors and print finishes are to your expectations, we strongly recommend ordering a sample kit.
If you choose a digital or letterpress printed suite, choose your ink color below:


If you choose a foil stamped suite, choose your foil color below:


.03
PAPER CHOICES
The collection is available to be printed on ivory or bright white paper as well as double or single ply.
Please note, the exact paper will depend on your printing method.

PAPER WEIGHT
Single ply is a substantial, 110 pound paper. Double ply is twice the thickness of single ply at 220 pound. If paper pounds don’t mean much to you, make sure you order a sample kit so you can feel the difference!

PAPER COLORS
For paper colors, you can choose between bright white and ivory. Bright white is, well, bright white. Ivory is a soft off-white. Your paper color selection will match your envelopes, unless you opt for a color envelope upgrade.
.04
ADDITIONS
Want to add something extra to your suite to give it that special touch? Explore our options below.